How Do You Automate Emails With Zapier?
Manually sending out welcome emails or thank you emails, can be a long and tedious process. You can waste a lot of time sending out these emails manually.
Or you can automate it.
Automating your email is actually really simple. And it will save you so much time.
You’re probably already automating some of your emails. If you use an email marketing service like Mail Chimp or Constant Contact, then you might have an automated email to go out to new subscribers.
But there are probably other templated emails you send out, which can’t be automated so easily. In a recent post, I talked about collecting email addresses of potential leads at expos, trade shows or other events.
You might be using a pen and paper to collect these emails or you could use a digital form on a tablet device. Either way, you want to follow up with these leads soon after the event via email.
And if you’ve got a list of 100+ leads, you don’t want to be manually emailing every one of them.
What You’ll Need
To automate an email like this you will need the following:
- Names and email addresses in a Google Sheets spreadsheet
- A Zapier account (this can be done with a free account)
- An email template
- A Gmail account (doesn’t need to be an @gmail.com address – you can import your business email into Gmail)
1. Add Names and Emails to A Google Sheets Spreadsheet
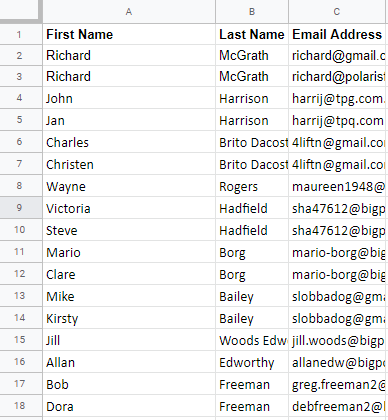
First name and email address are all you need but it doesn’t hurt to have last name and any other details as well. Make sure you have column headers.
I suggest just adding the contact details of one or two people at first and then add the rest after your Zap is set up. If you’re collecting email addresses online (eg. Google forms, Typeform, chatbot..) you should be able to set up another Zap to automatically add emails to your spreadsheet.
Your spreadsheet should look something like this:
2. Create New Zap in Zapier
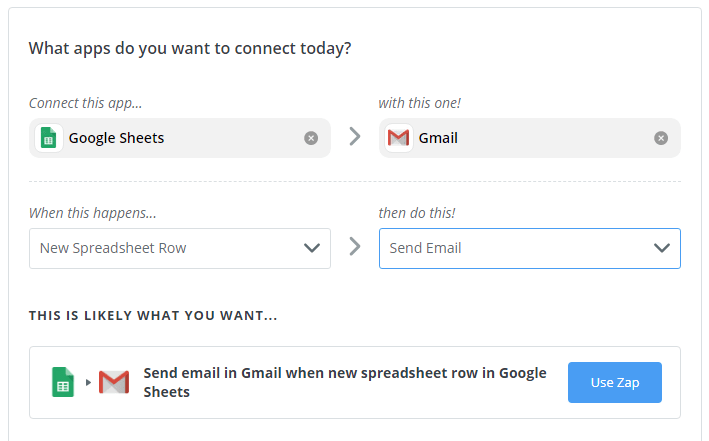
From your Zapier dashboard, look for where it says “What apps do you want to connect today?“
Where it says “connect this app,” select Google Sheets. And where it says “with this one,” select Gmail.
Below, you will need to select a trigger in Google Sheets. Choose “New Spreadsheet Row” and where you select an action, choose “Send Email.”
Click below, where it says “Use Zap.”

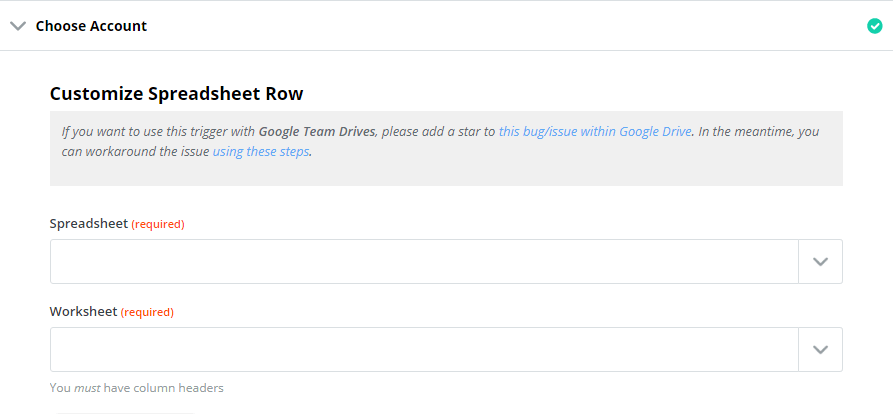
3. Connect Zapier to Your Google Sheets Spreadsheet
Firstly, you will need to give Zapier access to your Google sheets account. Then Zapier will ask you to select your spreadsheet and worksheet. Once you’ve done that, press Continue and then Test & Continue.
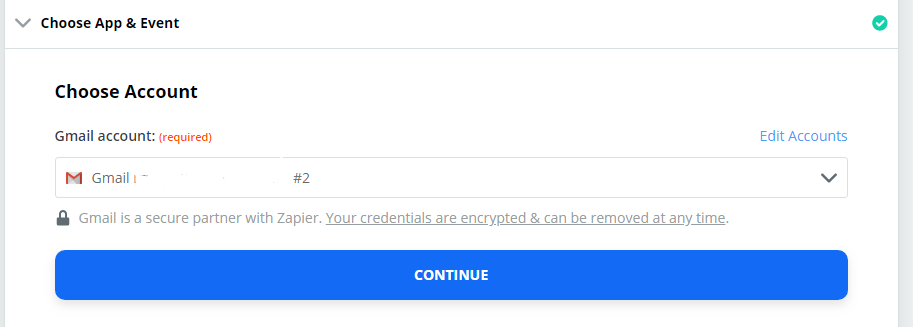
4. Connect Zapier to Your Gmail Account
Zapier will ask you to connect to your Gmail account. If you have multiple Gmail accounts, select the one that has the email address you wish to send emails from. Then press Continue.
5. Customize Your Email
On the next screen, Zapier will get you to create the email. Next to the ‘To’ field, click the plus sign:
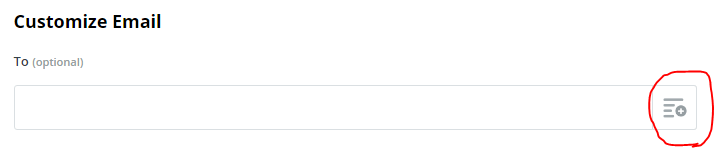
You should see the option to select the email column from your Google Sheets spreadsheet. This is how Zapier knows who to send the email to.
The rest of the fields on this page are self-explanatory. In the Body field (body of the email you’re sending), you may want to add the person’s first name.
To do this, click on the plus sign next to the Body field and you should be able to select the first name column from your spreadsheet.
It will look something like this:

Once you have completed all the applicable fields, press Continue.
6. Test And Activate Your Zap
Zapier will give you the chance to test your Zap to make sure it’s working properly. I suggest you do test it.
If you’re happy with the test, you can activate the Zap. Now every time a new lead or customer is added to your spreadsheet, Zapier will automatically email them for you.